Follow these steps to select the correct components to distribute and disperse air with a SimpleSox System.
Step 1: Select your Starter Kit diameter based on the amount of CFM delivered at the inlet using the chart below.

Step 2: Using the selected Starter Kit assembled length, determine which additional components are required to achieve the desired finished layout and length. Use the image below for the components options available outside of the Starter Kit you chose. Add the desired additional components, 90 Degree Elbows, 2ft, 4ft, 6ft, 8ft, or 10ft Inactive Sections, Adjustable Flow Devices, and extra Cable Assembly Kits if needed. Be sure to select the fabric color and quantities for each components before adding to your cart.
Note: If your system requires more than 100’ of cable or 200' for 28" diameter systems, you will need to add additional Cable Assembly Kits.
Optional Components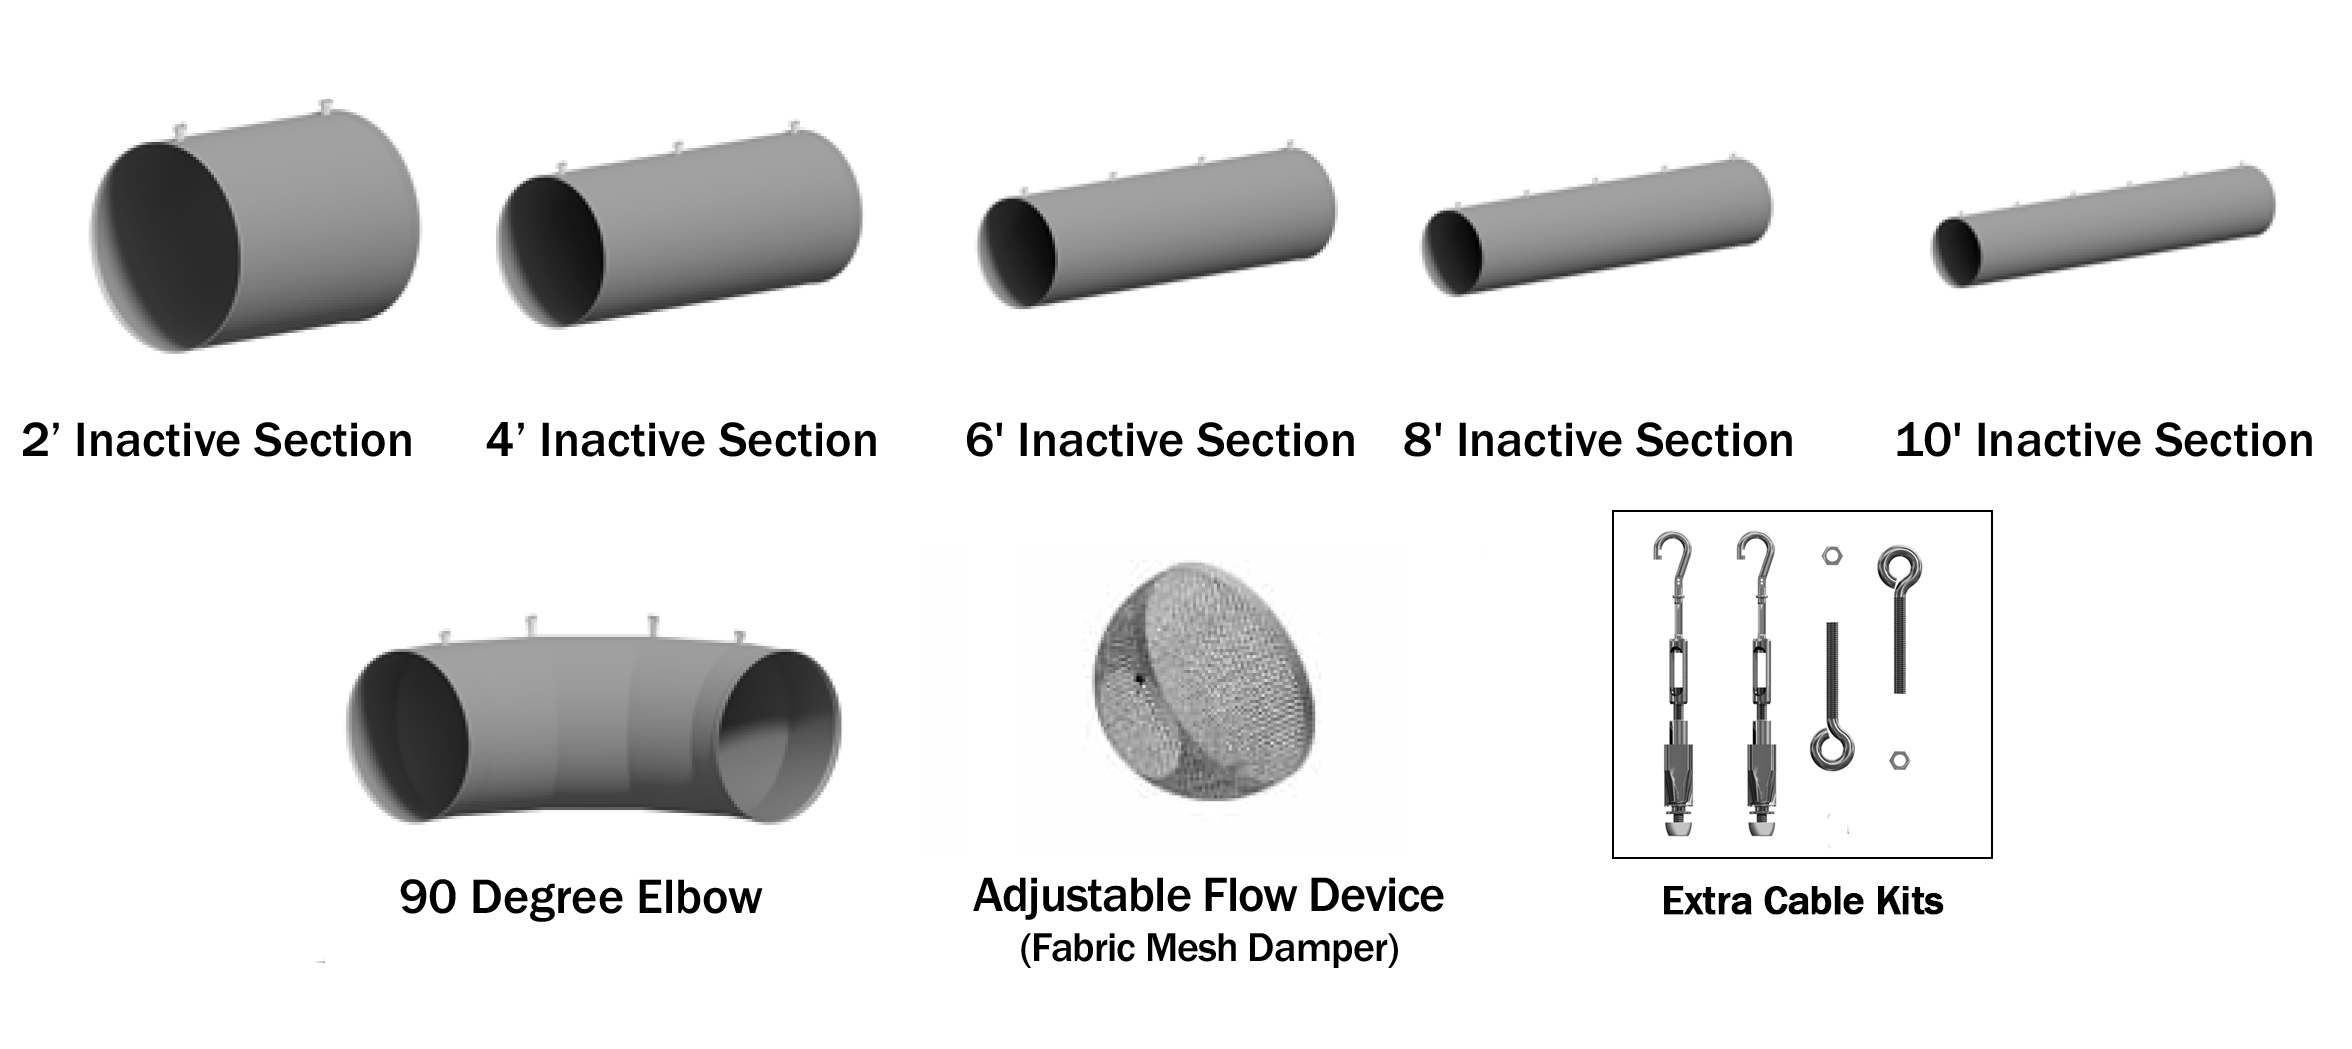 Sample 16" Diameter System:

Step 3: Now that you have ordered your SimpleSox System, start planning for the installation.